
Learn how to fit shelves into alcoves and other potentially wasted space in your home.
Well planned and constructed shelves can make any alcove both more attractive and more useful. It is also a fairly cheap and easy way to create a lot of extra storage space to a previously unused part of the room.
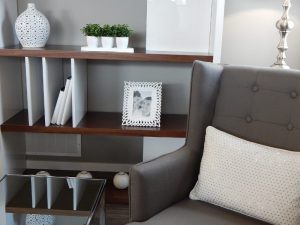
The recesses beside chimney breasts are a very popular location for shelving. This guide will show you two different ways to add shelves to any alcove, including the most common way, by using battens screwed into the side and rear walls.
Fitting Batten Supported Shelves
Batten supports are quick and easy to put together, and are perfect for supporting short shelves. Anything longer than about 1m will need better support or thicker shelving material.
1. Starting with either the top or bottom shelf, mark a level line on the wall all around the inside of the alcove where you want the lower edge of the shelf to sit. Measure along the line at the back of the alcove and cut some 50 x 25mm timber batten to fit. You don’t need to worry about mitred corners where the battens will meet in the corners of the alcove, you can just butt the battens up against each other.
2. Hold the batten for the back of the shelf against the wall so that it sits below the line and drill pilot holes roughly every 250mm along the length. Switch to your screwdriver or driver attachment and fix the batten to the wall using screws at least 50mm long.
3. The two battens that projects out towards the front of the alcove need to be at least 75% of the shelf’s depth. If they are not, you risk the shelf warping towards the front if something heavy is placed on it. Mitre cut the front end of these two battens so that the ends are less visible underneath the shelf, then hold, pilot and fix them in place as you did for the first batten.
4. Now measure up or down to where you want the next shelf and mark lines for it in the same way as before. Check the lines are level and then cut a batten for the back of the alcove. Repeat the steps above for this shelf and any remaining shelves you want to fit into the alcove. You should then have a set of shelf brackets ready to take shelves.
5. Check the dimensions of the alcove and cut the shelving material to fit. Decide beforehand if you want the edge of the shelves to be flush with the edge of the wall or to sit back from the edge. If the walls of the alcove are not square, you will need to scribe the shelves to make sure they fit without gaps.
6. Once you have the shelf sitting squarely on the battens, fix it in place using small nails or tacks every 250mm. Once the shelf or shelves are firmly fixed you can prime and paint them or sand them down to be left natural or varnished.
Fitting Ladder Supported Shelves
Ladder supports are more difficult to put together that standard batten supports, but will provide better support for the shelf and are perfect if you want to face the front of the shelf with moulding.
1. Ladder supports can be marked and measured in the same way as above, but don’t attach them to the wall and don’t mitre the ends of the forward facing battens. If you plan to face the front of the shelf with moulding, make sure you take the depth of this into account when measuring the side battens. Cut a fourth batten for the front of the frame and screw everything together to create a rectangle.
2. Make sure the frame fits into the alcove before you go any further. Now cut some short battens to fit between the front and back battens. Space them every 250mm and screw them into place. This gives the frame the ladder name. Hold the frame in place in the alcove and drill pilot holes every 250mm. Fix the frame into position using appropriate length screws, checking that it is level regularly.
3. Measure, cut and position the shelf material, making sure the front edge is flush with the front batten if you plan to fit moulding to the face of the shelf. Fix the shelf to the batten frame using small nails or tacks.
4. If you are fixing moulding to the front of the shelves, measure the width and cut the moulding to fit. Attach it to the front batten using panel pins, punching the pins below the surface of the wood. Fill the holes, either with standard filler or with coloured wood filler if you plan to leave the finish natural. Sand everything smooth and finish however you wish.


