
Carpet Underlay serves several useful purposes. It acts as a cushion for the carpet, helping to reduce wear and stopping the pile being flattened. Properly laid, it will also act as a very good insulator of both heat and sound, and will help to prevent dust and dirt rising up from the floor below it.
Laying underlay properly is not too hard, but if done incorrectly it can affect how the carpet looks and how long it remains in good condition. This guide explains the different types of underlay, when they should be used and how to fit them properly. Our Guide to Fitting Carpet can be found here.
Types of Underlay
Not all carpets will require a separate underlay to be fitted, but many do so it is useful to understand the difference between the different types.
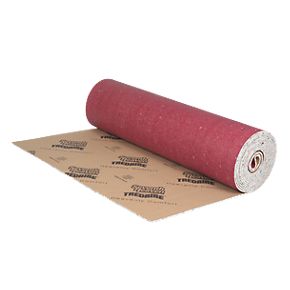
Sponge Rubber Underlay
Probably the most common type of underlay in the UK. This synthetic rubber is filled with tiny air bubbles and usually attached to a backing paper in a waffle pattern. This type of underlay is available in a number of different thickness’s, from Luxury to Light Domestic. The price obviously varies with the thickness, but it is still important to use the correct type in certain areas of the house. Light Domestic underlay, for example, is not suitable for stairs or heavy traffic areas.
PU Foam Underlay
 Usually made from recycled furniture foam, PU underlay is both comfortable and light weight. As with other underlay types, it is available in different thickness’ and therefore prices.
PU Foam is quite hard-wearing and is suitable for medium to heavy traffic areas. A fairly thin PU Foam underlay will often be more comfortable than a thicker Sponge Rubber underlay.
Crumb Rubber Underlay
Crumb Rubber underlay has been around for a long time but has been out of favour for a while. It is now making something of a comeback as it is relatively cheap, very hard-wearing and completely recycled (it is made from old car tyres). Crumb Rubber underlay is perfect for very heavy traffic areas such as stairs and hallways. This type of underlay will also recover completely from having heavy furniture on it, meaning there is less chance of permanent dents in the flooring when furniture is moved.
Laying Carpet Underlay
Tools you may need:
- Utility Knife (with spare blades)
- Tape Measure
- Staple Hammer or Staple Gun
- Underlay Tape (for taping seams in the underlay)
- Knee Pads (not essential, but good to have)
Preparing the Floor
Before you start to fit the underlay, you need to make sure that the floor is smooth and clean. If you are laying over a concrete floor, sweep and vacuum it and make sure that there are no sharp protrusions. If you are laying it over a wooden floor, make sure that any nail heads are knocked below the surface of the wood. Anything that is sticking up from the floor will damage the underlay over time and eventually damage the carpet as well.
You should also fit your carpet gripper rods around the edge of the room and a threshold strip across the doorway. The underlay will butt up to the side of the gripper rods, whilst the carpet is stretched to hook onto them. Gripper rods can either be nailed to the wooden subfloor, or glued to a solid (concrete) subfloor.
Fitting the Underlay
Underlay should always be fitted with the rubber facing the floor and the backing paper facing up. Roll out a few metres of underlay and position it in the corner of the room furthest away from the door. Butt the end of the roll up against the side of the gripper rods, not on top of them. Roll the underlay out to the opposite side of the room and cut it so that fits up against the edge of the gripper rod there (if you prefer, you can overlap the gripper rods with the underlay and then trim the excess when it is fixed to the floor). Ideally, the underlay should lay at right angles to the direction of the floorboards.
Fix this first strip of underlay to the floor, using either staples or tacks on a wooden floor, or double-sided underlay tape if the floor is concrete. Roll out the next section of underlay and butt this up against both the gripper rods and the first strip of underlay (don’t overlap the strips). Fix this strip tot he floor in the same way as the first strip, and then tape over the seam between the two strips with underlay tap. Continue laying strips in this way until you cover the whole floor. The last strip will almost certainly need to be trimmed to make it thinner. It is easier to fix it to the floor and then trim off the excess using the edge of the gripper rod as a guide.
Check that the underlay is all firmly fixed to the floor and the seams are taped. You are then ready to lay the carpet on top and finish the room.
[amazon_link asins=’B01MTY420L,B074ZNNLFJ,B01N7DW0Q9′ template=’ProductCarousel’ store=’subscribeands-21′ marketplace=’UK’ link_id=’7fb8758f-a54d-11e8-bc11-a949e2271138′]


