
Are you tired of your home feeling cold and drafty during the winter months? Look no further than loft insulation! Proper insulation can significantly reduce heat loss in your home and keep your family warm and cosy all season long. However, with so many insulation options available, it can be overwhelming to know where to start. That’s why we’ve created the ultimate guide to loft insulation.
In this comprehensive guide, we’ll explore the different types of insulation available, the benefits of each, and how to determine which one is right for your home. We’ll also cover the installation process and provide tips for maintaining your insulation for maximum effectiveness. Say goodbye to chilly nights and hello to a warm and comfortable home with our ultimate guide to loft insulation.
Understanding Loft Insulation
Loft insulation is a type of insulation that is installed in the attic or loft space of a home. It works by preventing warm air from escaping through the roof and into the atmosphere, which can significantly reduce heat loss and keep your home warm and cosy.
Loft insulation is particularly important in older homes or homes with poor insulation, as they are more likely to experience heat loss. By properly insulating your loft space, you can reduce your energy bills and make your home more environmentally friendly.
There are several different types of loft insulation available, each with its own benefits and drawbacks. In the next section, we’ll explore these different types in more detail.
Types of Loft Insulation
There are several different types of loft insulation available, including blanket insulation, loose-fill insulation, and rigid board insulation.
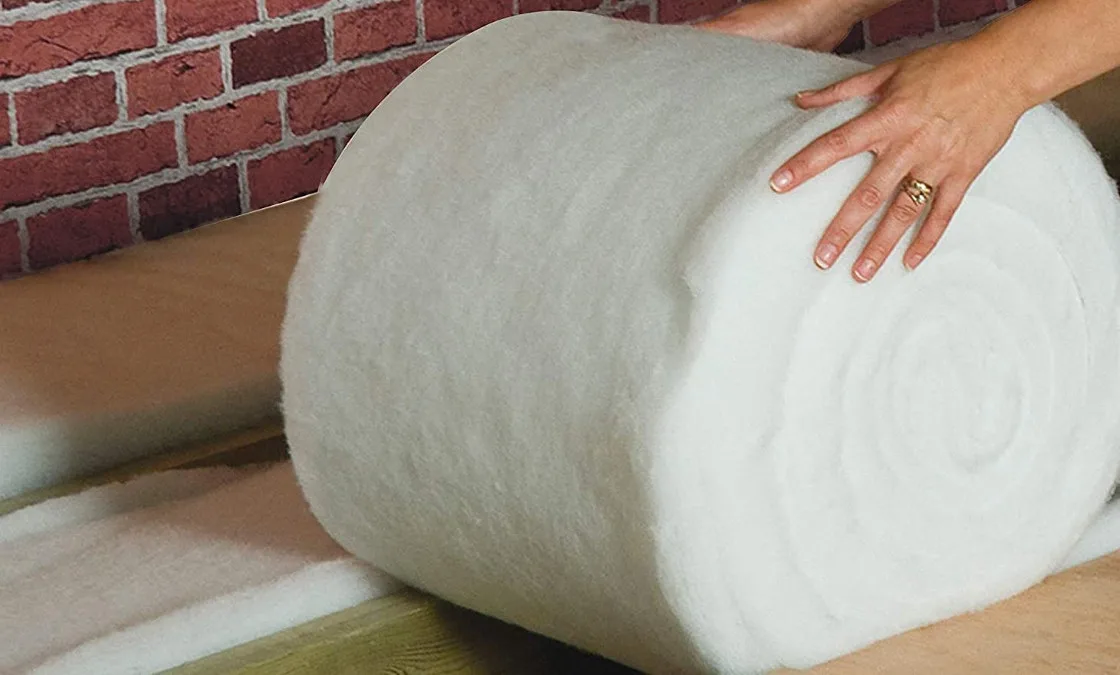
1. Blanket Loft Insulation
Blanket insulation is probably the most common type of insulation used in lofts. It is relatively easy to lay due to the fact it is supplied in rolls that fit easily between standard joist gaps and can be a cheap insulation solution. Blanket insulation is available in a variety of materials, including recycled and natural materials, as well as a variety of widths and thicknesses (depths).
2. Recycled or Natural Blanket Insulation
This is generally much more expensive, but does have the benefit of generally offering better insulation in a thinner layer, and being much nicer to install (it won’t make you itch and sneeze like standard insulation material will). You can lay it in almost exactly the same way as above, but you should check the specification to ensure the right depth is used.
3. Loose-fill Loft Insulation
Loose-fill insulation can be used as an alternative to blanket insulation, and is particularly useful for loft spaces that are awkwardly shaped, or that have access restrictions (it is easier to transport due to the fact it comes in bags smaller than a roll of blanket insulation). As with blanket insulation, loose-fill insulation is available in conventional and recycled versions (such as recycled paper)
4. Slab or Rigid-board Loft Insulation
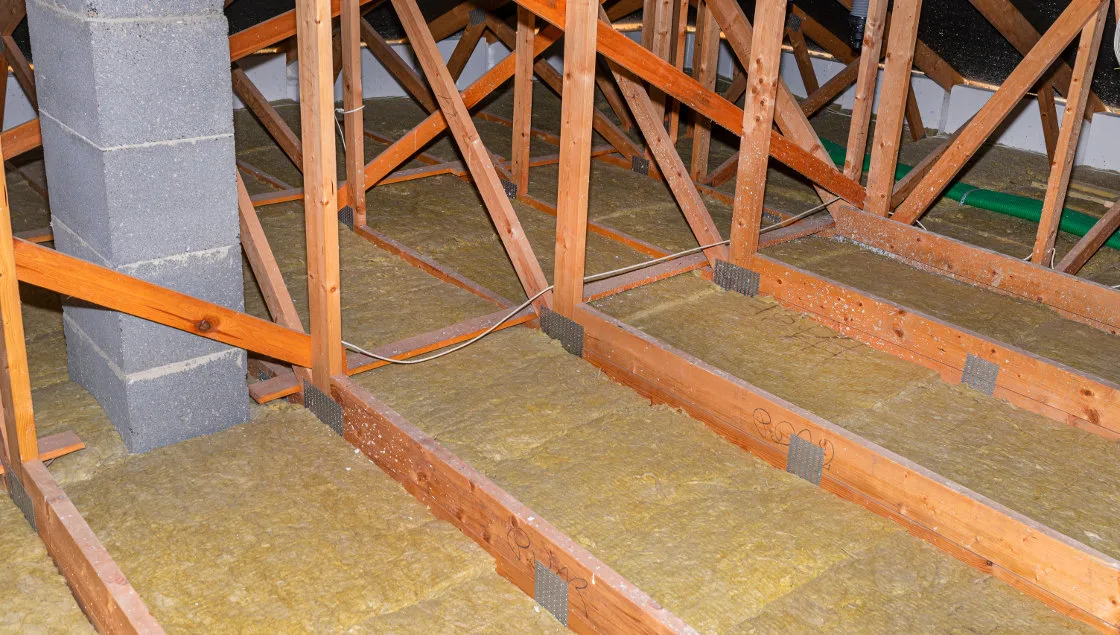
Slab insulation is basically the same as blanket insulation, but comes in large slabs rather than rolls and is often more dense. As with blanket insulation, slab insulation comes in a variety of widths to fit different joist gaps. You can also buy extra high-density slabs, which can help with sound insulation. Simply lay the slabs into the gap between joists and cut to fit as necessary. As with other insulation types, wear gloves and a mask to avoid irritation.
How to Measure Your Loft Space
Before installing loft insulation, it’s important to measure your loft space to determine how much insulation you will need. To do this, you will need to measure the length and width of your loft space and multiply the two numbers together to get the square footage.
You will also need to measure the depth of your current insulation to determine how much additional insulation you will need. The recommended depth for loft insulation is typically between 250mm and 270mm, so if your current insulation is less than this, you may need to add more.
Step-by-Step Guide to Installing Blanket Loft Insulation
If you decide to install loft insulation yourself, here is a step-by-step guide to help you get started. Laying blanket insulation is fairly easy, but you should follow some basic rules to give the best results and to keep yourself safe.
1 – The first step is to sweep the areas between the joists, getting rid of any dirt and debris laying on the plasterboard/lath and plaster surface. If the plasterboard is silver-backed and in good condition, you shouldn’t need to lay a vapour barrier. If not, it is always advisable to lay one before you lay the insulation.
2 – Vapour barrier can be bought in rolls, then simply laid out between the joists and cut to length. It should then be stapled to the inside face of the joists along both edges to hold it in place. If you need to, simply cut holes in the vapour barrier sheet to accommodate pipework or electrical fittings.
3 – You can now start laying the blanket insulation, making sure you are wearing eye, mouth and nose protection, as well as gloves. A useful tip is to not unpack the rolls from their plastic packaging until they are in the loft space, to avoid insulation fibres getting spread over the rest of the house. Roll out the blanket insulation between the first two joists, taking care not to compress the material too much, and tucking it in against the sides of the joist.
4 – Continue to lay the blanket insulation in all of the gaps between joists. If you reach the end of a roll in the middle of a run, simply butt the next roll up against it, making sure that there is no gap between the two sections.
5 – The insulation should be cut to fit around any electrical fittings that are sited in the middle of a run. If you don’t do this, the insulation could cause the electrical fitting to overheat, so this is an important step. Any electrical wiring that runs along the gaps between joists should be lifted above the insulation, so that does not overheat. It can be laid on top of the insulation blanket safely.
6 – If required, you can build up layers of blanket insulation to meet your own requirements or any local insulation regulations. If you plan to lay hardboard over the blanket insulation to form a floor surface, you may need to increase the depth of the joists to avoid the insulation being compressed too much. You can do this by nailing wooden battens, of the required thickness, on top of the joists.
Step-by-Step Guide to Installing Loose-fill Insulation
Laying loose-fill insulation is easier than laying blanket insulation, but will require a bit of additional preparation.
1 – Just as with blanket insulation, you should clean out the gaps between the joists, and lay a vapour barrier (if the ceiling plasterboard isn’t silver-backed). Roll out the vapour barrier material between the joists, and staple it in place along the inside edges of the joists.
2 – To avoid the loose-fill material from escaping through the small gaps under the eaves, you should cut and lay a small barrier of blanket insulation all the way around the edge of the roof space. You only need a small 400mm section of blanket, that you lay between the joists where they meet the eaves. If the roof is lined with a non-breathable felt, leave a small gap between the blanket barrier and the eaves gap, to allow for ventilation.
3 – You can now start to lay the loose-fill material. Working from the eaves on one side of the roof space to the other, begin to carefully pour the loose-fill material between the joists. Fill the gap up to the top of the joist level. When you fill one section of the area, use an offcut of plywood or MDF, cut to the same width as the gap between joists, to scrape the material flat and level all the way across the roof. Any excess can be moved into the next gap to be filled.
4 – Once the loose insulation is all laid and levelled off, you should have even coverage across the entire loft space. If you need to meet depth regulations, check the depth by pushing a tape measure down through the fill to the plasterboard.
5 – Unlike blanket insulation, you can’t simply cut a section out to avoid electrical fittings. Instead, build a small wooden square or rectangular frame that can sit around the fitting and hold back the loose-fill material. An alternative is to create a tube of thick cardboard that can be placed around the fitting in the same way to hold back the loose-fill.
Deep Filling Loose-fill Insulation
It is possible to deep fill this type of insulation, but it will mean that the joists are obscured and the space is unusable. Just continue to pour loose-fill material over the top of the existing layer, until it is at the depth you require. You will probably need to create some sort of movable platform to stand on as you work, as the joists will be obscured.
It may be better to instead install a decking of boards over the joist-level filling. This will provide an extra level of insulation, and also mean the roof space is usable for storage, etc.
Common Loft Insulation Problems and How to Solve Them
While loft insulation can be an effective way to keep your home warm, there are some common problems that can occur. One of the most common issues is condensation buildup, which can occur if the loft space is not properly ventilated.
To prevent condensation buildup, it’s important to ensure that your loft space is properly ventilated. This can be done by installing vents or by leaving a small gap between the insulation and the roof to allow air to circulate.
Another common problem is draughts, which can occur if there are gaps in the insulation. To prevent draughts, be sure to seal any gaps with foam sealant and cover the insulation with plastic sheeting.
Maintenance and Upkeep of Loft Insulation
To ensure maximum effectiveness, it’s important to maintain and upkeep your loft insulation. This can be done by regularly checking for any gaps or damage and repairing them as necessary.
It’s also important to ensure that your loft space is properly ventilated to prevent condensation buildup and to regularly check for any signs of dampness or mold.
Energy Savings and Cost Benefits of Loft Insulation
By properly insulating your loft space, you can significantly reduce your energy bills and make your home more environmentally friendly. In fact, loft insulation can save you up to £590 per year on your energy bills, according to the Energy Saving Trust. This is based on the difference between an uninsulated loft and a loft with 270mm of insulation.
While the initial cost of loft insulation can vary depending on the type of insulation you choose and whether you opt for DIY or professional installation, the long-term cost benefits make it a worthwhile investment.
Installing Insulation for Lofts – Conclusion
Proper loft insulation can make a significant difference in the comfort and energy efficiency of your home. By understanding the different types of insulation available, measuring your loft space, and properly installing and maintaining your insulation, you can keep your home warm all winter long while also saving money on your energy bills.


