When fixing into plasterboard, using the correct Plasterboard Fixings is essential if you want to reduce the risk of your shelves, pictures, and other wall-hanging objects pulling out of the wall. A plasterboard is essentially a layer of compressed plaster dust between two sheets of paper. If the structure is intact, it is reasonably strong and resilient. However, as soon as this structure is broken by a screw or nail, the plaster inside can be liable to crumble, and getting a good fixing is difficult.
If possible, when fixing into plasterboard wall you should try to screw into a stud or noggin (electronic stud finders are available to help you find the wall studs) but sadly this is not always possible or practical. Luckily there are numerous specially designed plasterboard fixings that can help to overcome this problem.
Plasterboard Fixings
All plasterboard fixings are designed to do basically the same thing: Increase the area of the plasterboard which is put under stress by the object hanging from it. However, not all of them do this in the same way and not all of them are suitable for all applications. As a general rule, use plastic or metal screw in fixings for light loads, plastic anchor or spring toggles for medium loads, and metal spring toggles for heavy loads.
Plastic Expanding Anchors
A neat and strong, all-in-one plasterboard fixing. These are available in a variety of types, with standard screw heads, as well as hooks and loops. This makes them good for hanging things from a plasterboard ceiling. They are also available in a range of sizes. A hole is drilled that matches the width of the unexpanded plastic sheath. The expanding anchor is pushed all the way into the hole and then tightened by turning the screw, hook, or loop. As the screw tightens, the plastic sheath spreads until it is tightly pulled against the inside face of the plasterboard.
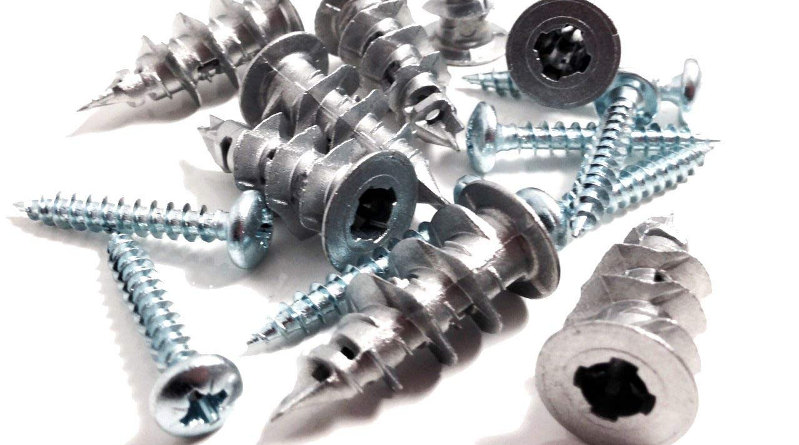
Self-Drill Screws (Speed Plugs)
These plasterboard screws combine a metal or nylon plug with a screw thread for the fixing screw. They vary in size and length but they all have the deep outer thread in common. The deep thread is designed to give a much better grip on the plasterboard, whilst also spreading the weight of the object they are holding up. Suitable for light loads and plasterboard in good condition.

Plasterboard Plug
These plastic plugs are not much different from standard wall plugs, except that they are generally shorter and wider, and they spread more when the fixing screw is inserted and tightened. Cheap and easy to use, but only suitable for light loads. As with a normal wall plug, a hole of the correct size needs to be drilled into the plaster (slightly smaller than the plug) before the plug is inserted.

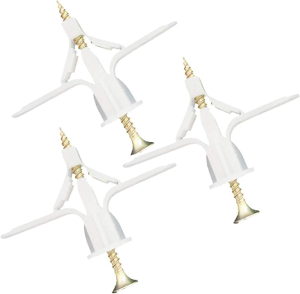
Poly-Toggle or Nylon Toggle
These plastic or Nylon fixings are squeezed flat and slotted into a pre-drilled hole. Once inside, the flattened end opens out to act as the anchor. The screw then pulls the two flaps or wings flat against the inner face of the plasterboard to fix it in place.
Take particular care to drill accurately sized holes when using poly or nylon toggles. Plastic or nylon poly toggles are suitable for light to medium loads such as lighting fixtures. Poly-toggles or nylon toggles work in a similar way to the plastic expanding anchors above.
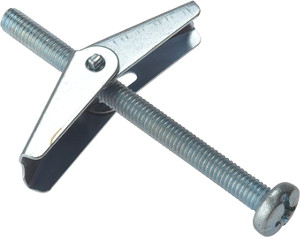
Metal Spring Toggle
Metal spring toggles offer the best support for hanging on a plasterboard wall. The metal toggle is squeezed flat and pushed through the drilled hole in the plasterboard. Once it is behind the plasterboard, the toggle springs open and the two wings pull flat against the inside face. As the supplied machine screw is tightened, the wings are pulled tight against the inside face and spread the weight of the load.
When using spring toggles, you will need to remove the spring part from the machine screw and then pass the screw through whatever you are fixing (cabinet, etc) before re-attaching the spring toggle and pushing it into the hole in the plasterboard.
Cavity Fixings (Cavity Fixers)
Cavity fixings work in a similar way to plastic or poly toggles. They are pushed into a pre-drilled hole and then the action of the machine screw turning in the fixing spreads four wings outwards to grip against the inside face of the plasterboard. Most cavity fixings have a toothed flange to grip the outer surface of the plasterboard. This needs to be pressed firmly into the surface of the plasterboard to stop the fixing turning as it is tightened.

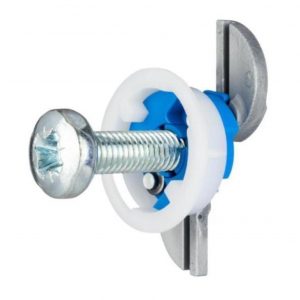
GripIt Fixings
These relatively new plasterboard fixings are available in a variety of colours, each capable of holding different maximum weights. These range from blue (113kg) to yellow (71kg). GripIt fixings work by having three separate loading points, dispersing the weight of the object being held better than many traditional fixings. They are only really suitable for use in places where they will be hidden behind the fixture. A large hole needs to be drilled, and the GripIt sits flush at the edge and is clearly visible. You can find out more about GripIt fixings here.
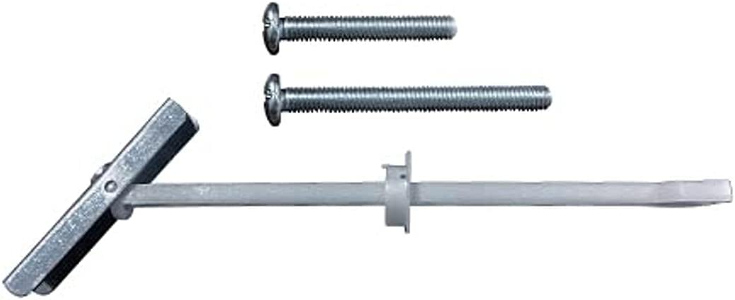
Gravity Toggle
Gravity toggles comprise a machine screw with a hollow metal tube attached to a pivot. The tube is pushed through the drilled hole and once it clears the back of the plasterboard, swings down on its pivot to lay flat against the inside. The machine screw is then turned to pull it tight. If the machine screw is unscrewed fully, the toggle part will be lost inside the wall. Can be useful when fixing into plasterboard ceilings.
Plasterboard Fixings – When hanging anything heavy from a plasterboard wall, it is always better to use more fixings than you might normally need. Using four plasterboard fixings instead of, say, two fixings, will greatly help to spread the load of the wall unit, shelf, etc, and therefore reduce the chance of the fixings pulling out of the wall.
Get over 16000 woodworking plans. Learn how to build anything from furniture to birdhouses out of wood. Clear and detailed plans that guide you through the process of each project step-by-step.
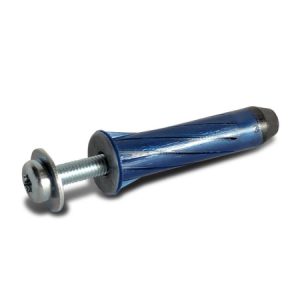
Fixing to Dry-Lined Walls
Walls that have been dry-lined (Dry Lining: fixing a layer of plasterboard to battens screwed or nailed onto brick or block wall to improve insulation) may need a slightly different approach when fixing things to them. The cavity in a dry-lined wall is usually only about 40mm maximum, so your choice of fixing may be restricted.
If fixing light loads, you can use normal plasterboard fixings such as self-drill plugs and poly toggles. However, if you are planning to hang a heavier load, you should use a frame plug system. Frame plugs are very long wall plugs and screws that can span the cavity in a dry-lined wall and fix into the brick or blockwork behind. When using frame plugs, make sure you choose one which is long enough to pass through the cavity and into the wall to a depth of at least 40mm.
Plasterboard is without a doubt a great building material. It is lightweight, easy to handle, and easy to fix to a wooden stud framework. Considering the thickness of it, it provides reasonable insulation from both sound and heat/cold and does a good job of resisting fire. Sadly, it is not very good at having things hung from it.


