
Replacing worn and split felt on the roof of a shed is essential if you want your tools and other garden equipment to stay in good condition. If possible, check the state of the felt on your shed roof at least once a year. Doing this will allow you to spot potential problems before rainwater starts to leak into the shed.
You might need to replace the roofing felt as often as every 2-3 years if your shed is situated in an exposed part of your garden. However, buying good quality felt and fitting it correctly should mean that maintenance will be required less often. And as even a new small shed could cost £300, spending a small amount of time and money to keep yours in good condition makes good financial sense.
If you only need to patch a hole in otherwise good felt, take a look at our Patching Roof Felt guide or our tips on how to Repairing Roof Felt for some general flat roof repair tips.
You will need:
- Shed Roof Felt
- Roof Felt Adhesive
- Hammer
- Felting Tacks/Small Nails
- Hammer and Prybar
- Stepladder
- Tape Measure
Removing the Old Felt and Nails
The first thing you need to do is remove the old, worn felt from the roof. Generally, the felt is tacked along each edge with small nails. It is a good idea to wear goggles and safety gloves while you do this because old felt can throw off a lot of small bits of grit as it is moved around.
- Carefully pry off any facia boards along the front, back, and sides of the shed. The felt will usually extend behind the facia boards, so removing them makes your job easier.
- Locate and pry loose all of the felting tacks using a small pry bar or a claw hammer.
- If any of the heads break off from the nails, hammer them below the surface of the wood so that there are no sharp points to rip the new felt.
- After removing all of the nails, you can strip the old felt off the roof. It is best to fold the old felt in on itself before moving it, as this helps contain any loose materials.
Can You Put New Roof Felt Over Old Felt?
It is possible to put new felt on top of the old felt, and for a large area, this can save a lot of time and mess. But for a small surface area like a shed roof, removing old felt should be relatively quick and easy. Having a flat, solid surface like bare wood to work on will also make fitting new felt a bit easier and give a neater finish.
If you decide to leave the old shed roof felt in place, ensure it is as clean as possible and that any loose material has been brushed off. Any large stones or pieces of debris could rip through the new felt layer when it is laid.
The instructions for replacing shed roof felt below are basically the same for bare wood and a roof where the old felt has been left in place.
Check and Treat the Roof Timber
Carefully examine the exposed wood (especially where there were holes in the felt) and ensure that it is sound. If any of the timber needs to be replaced, do so now.
- If the timber planks are tongue and groove, you’ll need to cut through the tongue with a hammer and sharp chisel before you can lift the board out.
- Measure the existing timber boards and cut a new piece to match. If it is a new tongue and groove piece, cutting one of the tongues off will make it easier to fit. You can use any softwood for the replacement plank.
- Nail this in place using galvanised screws or nails, being careful to ensure that the heads are flush with, or below, the surface of the wood.
If there is damage to the narrow fascia boards, or if any are missing, cut a new one from a matching piece of wood and paint it with a good wood preserver solution, ready to be replaced later.
It is also a good idea to take the chance to treat the rest of the roof timber with a coat of wood preserver. Let this dry completely before continuing.
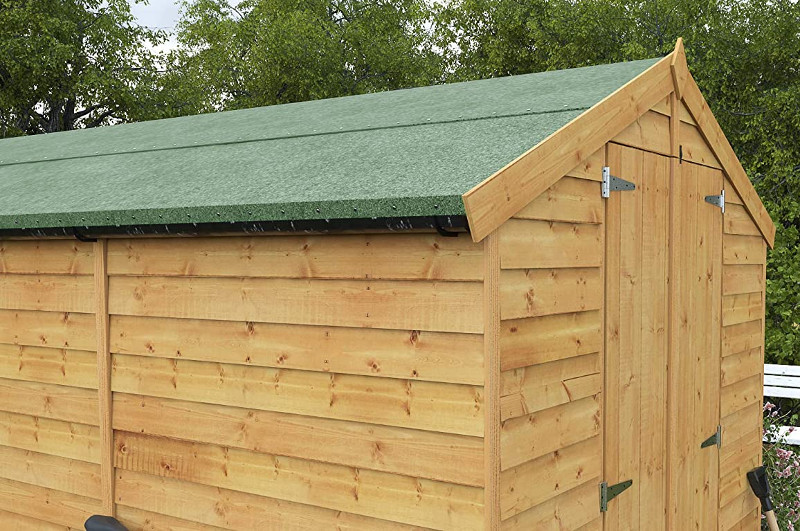
Laying New Felt on a Ridged Roof
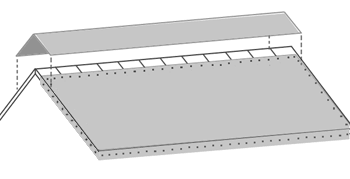
Unroll your new sheet of felt and measure out the length of the roof. Rolls of felt are commonly 100cm wide, so you’ll need to cut more than one piece to cover the whole roof area. Most ridged-roof sheds will require three pieces of felt: one on each flat side and one on the ridge.
Make sure that any section of felt you measure and cut has a 50mm margin on each edge to allow for overlap and for the joints to be sealed well. You don’t need any special tools to cut felt, a Box Cutter and any straight edge will work well.
- Measure the roof length and cut one piece of felt for the first side. Include a margin of 5cm at each end to allow for the overlap that will go under the facia boards.
- Lay the felt strip onto one side of the roof, with 5cm overhanging at each end and along the side.
- Secure the felt in place with a row of nails hammered in along the top edge. These should be spaced at 10-15cm intervals.
- Repeat this on the opposite side of the roof. This should leave a gap at the ridge, between the two sheets.

- Measure the width of this gap and cut a strip 10cm wider than your measurement to allow for some overlap. Remember to include the 5cm margin at each end as well.
- Apply a 5cm strip of roof felt adhesive along the top edge of both sheets you have already fitted.
- Lay the cut strip of felt evenly along the ridge and press it down into the adhesive where it overlaps the two previously-installed sheets. Not nailing the through “cap” sheet reduces the chance of leaks, but you can add a few nails along the overlapped margin if you think it needs to be more secure.
- Now work your way around the edges, pulling the felt tight and nailing it along the overhang. Make a slit in the overhang at the edge of the ridge to help it fold down flat.
You can now trim off any excess felt around the edges and replace the facia boards to cover the nailed overhang and keep everything looking neat.
Replacing Felt on a Flat or Pent Shed Roof
Replacing roof felt on a shed with a pent roof (flat, with no ridge) is easier than on a pitched roof, but you should still take care to do it correctly.
- Measure the length of the roof and cut a sheet of felt, allowing 5cm at each end for an overhang.
- Starting at the lowest edge, lay the cut sheet of felt on the roof and position it to overhang at the edge and both ends.
- Nail it into the roof timber along the top edge, spacing the nails out at 10-15cm intervals.
- Spread adhesive along this top edge in a 5cm strip and apply the next strip of felt. The bottom edge of this second sheet will sit in the 5cm band of adhesive, and the top edge should be nailed as before. Continue to do this until you reach the opposite edge of the flat roof.
- Smooth the last sheet felt over the edge and nail it onto the fascia here. You can then go along the sides of the shed and nail the felt along the edge of the roof boards.
- Trim off any excess felt and replace the facia boards to cover the overlap.
Check that the glued seams between the sheets of felt are pressed down firmly. A decorator’s seam roller is perfect for ensuring there are no unglued areas along these joints. If you want extra security for the felt, hammer in a few nails along each seam.
SHED ROOF SAFETY – Shed roofs may not be particularly strong so work from a stepladder or platform at the side of the roof. If you need to move onto the roof of the shed, use planks to spread your weight across the roof.
Roofing Felt
Roofing felt suitable for sheds is available in several colours, thicknesses and types. Most roofing felt is bitumen coated and then finished with a coloured mineral (usually green or grey). The mineral finish makes the felt more appealing to look at. More importantly, it helps to stop the felt from being damaged by UV rays.
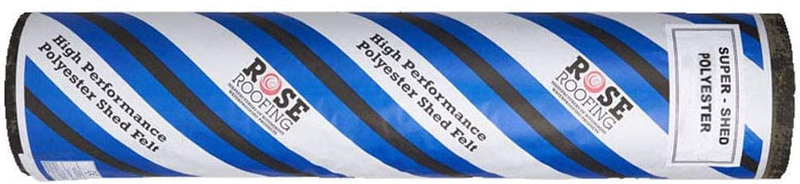
Better quality shed roof felt may be reinforced with polyester, as well as bitumen. Heavy-duty felt could last for up to 15 years, depending on location. However, you could find yourself paying two or three times as much for this type of felt.
You can get this Rose Heavy-duty Roofing Felt for only £29.95
Roofing Felt Adhesive
There are two main kinds of DIY roof felt adhesive available: paint on and trowel on. Both are applied cold and do the same job, but paint on adhesive is much easier to work with.
For sealing the seams between the sheets of felt on a shed roof, the paint-on adhesive is perfectly acceptable. It is generally also much cheaper than the trowel-on type.


