There are several ways to cut tiles correctly, depending on what type of cut you are trying to achieve. Straight cuts are best done with a tile cutting jig. This is a purpose made device which makes it easy to hold and score a line in a tile. Once the glazed surface has been scored, the tile should snap along the line easily by applying pressure on both sides. You can, of course, cut tiles in the same way without a tile jig. Simply score the tiles with a handheld scoring tool and place the tile on a piece of flex stretched out on a bit of wood (with the score line running along the flex). Pressure on either side will snap the tile cleanly in two.
If you need to cut a very thin strip from the edge of a tile, or if you need to cut out an irregular shape (to accommodate a pipe for example), Pincers are the best tool to use. Pincers (sometimes known as nippers) are used to “nibble” away at the edge of the tile until you reach the desired mark. If you are just taking off a thin strip, score the tile as you normally would for cutting.
Another option is a tile saw. Tile saws are ideal for cutting off the corner of a tile to fit around a light switch or for cutting out a notch for pipe work. The blade of a tile saw resembles a thin strip of wire with a cutting edge all the way around. This means it can cut in any direction.
Rooms in which tiles are most likely to be used, such as kitchens and bathrooms, are unlikely to be perfectly square with no obstacles to tile around. Being able to cut and shape tiles accurately and smoothly will not only help to create a better finish, but will also save time and money as you will hopefully waste fewer tiles.
Finishing a Row of Tiles

If you are lucky, when you come to the end of a row of tiles a full tile will fit perfectly in the last gap. More likely, the last tile in a row will need to be cut to fit into the gap. When you reach the end of a row, hold the last tile up against the second to last tile, sliding it up to butt against the wall. Mark a cut line on the tile at the edge of the previous tile, taking into account the 3mm gap you need to leave for the grout.
Use a platform tile cutter to carefully score the tile, and then use the lever to snap the tile along the score line. Hold the tile against the wall to check that your mark was accurate, before buttering the back of the tile (applying adhesive) and pressing it firmly into place. Place the tile with the cut edge against the end wall.
You should measure each end tile as you need them, as few walls are perfectly straight.
Cutting a Curve into a Tile
There are several occasions when you may have to cut a curve into a tile, when tiling around a wash basin for example, and making an accurate mark and cut is the difference between a good finish and a great one.
The first thing you need to do is to cut a piece of thin card to the exact size of the tiles you are using. This will be your first template (you may need to cut several for different parts of the curve). Hold the template in place against the last tile before the curved area starts, and carefully cut the card until it fits the curve perfectly. It is better to cut small pieces at a time until you are sure the fit is good, rather than trying to cut along the curve in one go. You can often crease the card along the curve and then cut along the crease.
You now need to use a chinagraph pencil to transfer the curve of the template onto a tile. Clamp the tile face up onto a workbench (use a small piece of wood under the clamp to stop it marking the tile surface) and use a tile saw to carefully cut along the mark. Take your time and apply as little pressure as possible to avoid chipping the edge of the cut. Use a tile file to finish off the edge of the tile and to make sure it fits perfectly.
Cutting Narrow Strips from Tiles
Cutting anything less than about 15mm off the edge of a tile is difficult with a platform tile cutter. It is far better to use a pair of tile nibblers to snap off small sections until you have taken the tile back to the size you need.
Before you can use tile nibblers however, you need to score a line in the tile using a hand-held tile scorer and a straight edge. When scoring a line with a tile scorer, you need to apply more pressure than that applied by a platform tile cutter. You need cut right through the glaze of the tile in order to get a clean cut.
Cutting Slots for Pipes
If you are tiling near or around showers or sinks, you will probably have to, at some point, cut slots in tiles to fit around pipes. Hold the tile to be cut in line with the last tile before the pipe, pushing it up against the pipe so that you can mark the width and position of the pipe on the tile (using a chinagraph pencil). Extend these marks right across the tile. You can now measure from the closest edge of the last tile, to the far side of the pipe to find the length of the slot you will need. Transfer this length onto the tile between the two lines you just made. Use an offcut of pipe or a small coin, hold it between the two lines and inside the mark you made for the edge of the pipe and draw around it to give you the shape of the slot where the pipe will eventually sit.
Clamp the tile to a bench (protecting the tile face with a small piece of wood beneath the clamp) and use a tile saw to cut out the shape of the slot. Cut carefully and apply as little pressure as possible. You need to be particularly careful when cutting the semi-circle at the end of the slot. The edges of the slot can be cleaned up with a file. This is a tricky thing to do, so it is worth practicing on an offcut of tile before trying it on the tiles you wish to use.
Cutting Border Tiles
When tiling any surface, you should always lay the whole tiles (field tiles) first. Once all of the field tiles are laid, you need to go back and cut the tiles to fit around the outside (border tiles) and around obstructions such as window frames and light fittings.
Cutting straight edged border tiles is relatively easy, but make sure you measure the gap for each tile rather than just measuring one gap and cutting all tiles to that width. Walls, especially in older houses, are very rarely perfectly straight.
1. To measure exactly where you need to cut a border tile, hold it face down against the tile it will be next to and with its edge against the adjacent wall or edge of the tiled area.
2. Mark the back of the tile where it overlaps its neighbour (allowing 3 mm for normal spacing) and then transfer the marks to the edge of the tile.
3. You can now score the face of the tile with a tile cutter to penetrate the glaze and snap the tile along the score mark.
4. To get a nice clean break, pin a length of thin wire to a bit of scrap hardboard. Lay the tile on the wire so the scored line is over the wire and then press gently down on both sides of the tile.
Clean up the cut edge of the tile with a tile sander or slipstone. You can now lay the tile into position. Make sure you don’t slide it into position or you will move the adhesive bed and weaken the fixing.
Safety when Tiling!
Always wear goggles when cutting tiles to avoid small chips getting in your eyes.
Make sure the room you are tiling is well ventilated. Tile adhesive and grout can be noxious and breathing too much of it is not a good idea.
Tiling Scribe
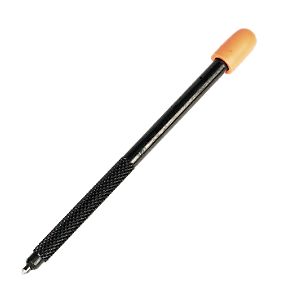 If you think you will need to shape a lot of tiles by hand (curves, etc.) a Tiling Scribe is a very useful tool. Shaped like a pencil, the tungsten carbide tip can be used to score irregular lines in tiles which can then be nibbled away with tile nibblers.
You can pick up a tiling scribe for only a few pounds, and it is certainly a useful tool to have in your DIY toolkit.
Using Electric Tile Cutters
You can buy several different electric tile cutters, as well as attachments for craft tools such as the Dremel range. These tools may not be cost-effective if you only need to cut a few tiles, but if you think you will need to make a lot of tricky cuts, you may want to think about buying just such a tool.
Vitrex Diamond Bit Tile Cutter


