
Although tiles provide a generally hard-wearing finish, a hard knock (when moving furniture for example) can crack or chip them. Replacing a single or multiple cracked or broken tiles is a fairly simple task as long as you take the correct precautions before you start.
Finding Replacement Tiles
Hopefully, when you laid the tiles, you kept a few spares for just his sort of situation. If you didn’t lay the tiles or don’t have a spare, you will need to try to buy a matching replacement.
Once you have removed the cracked or broken tiles, you can take a piece to your local tile specialist so you can accurately match the colour and finish. If this isn’t an option, you will need to take a piece of the tile to a DIY store and just try to find a good match.
If your tiles are unusual, or the crack is not serious enough to warrant the replacement of the tile, you can try repairing it instead. Ceramic tile repair kits are available which allow you to match a colour and then fill a crack in a chipped tile. More on this at the bottom of this page.
1. Mask Off the Surrounding Tiles
Your first job is to mask off the tiles surrounding the tile or tiles you are going to remove. This will help to stop them from getting damaged when you are working on the broken tile. You can use ordinary decorators’ masking tape for this. If you are working above a ceramic bath or sink, it is also a good idea to lay down an old sheet in case you drop any of your tools.
Using a Grout Rake, scrape out the grout from around the broken tile. Now stick some tape in the middle of the broken tile and drill three or four small holes in the centre. The tape will stop the drill bit from slipping as you drill. Drilling holes in the middle of the cracked tile will help to ensure that it breaks up more easily.
2. Removing Cracked or Broken Tiles
You should always wear gloves and protective goggles when breaking up tiles. Small chips of ceramic glaze can fly off in all directions and could easily cause an injury to your eyes.
Using a small cold chisel or an old woodworking chisel, start to break up the tile, starting from the holes in the centre. Gradually work your way out until all of the tile has been broken up and removed.
Take care near the edges or you risk dislodging the surrounding tiles as you work. If any of the surrounding tiles feel loose, you should consider trying to prise them off the wall and reattaching them.
3. How to Remove the Tile Adhesive
Once the tile is out of the way, you need to get rid of the old tile adhesive so that the replacement tile sits flush in the hole. Do this carefully with a cold chisel to avoid damaging the wall behind.
This part of the process can be a bit fiddly, so take your time and make sure you d not chip the edges of the surrounding tiles. Once the wall is cleared of old tile adhesive, brush or vacuum out any dust.
4. How to Affix the New Tiles
Apply your tile adhesive to the back of the replacement tile and press it carefully into place in the hole. It is usually easier to do it this way, rather than applying the adhesive to the wall as you normally would when laying tiles. Use tile spacers or matchsticks to ensure the gap around the edge is uniform.
Leave this to dry in place for the recommended time and then apply the grout. Polish this off when it is dry and your tiled wall should be as good as new.
How to Repair Small Chips and Cracks in Tiles
For small chips and cracks in ceramic tiles, Ronseal’s Kitchen and Bathroom Repair Kit is hard to beat. Applied with a brush and giving a smooth and solid finish, it is perfect for breathing new life into old kitchen or bathroom tiles and fittings.
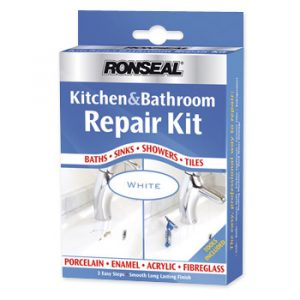
The kit enables you to instantly repair kitchen and bathroom fixtures and appliances. Use it to repair tiles, sinks, washing machines, baths, ceramic tiles, refrigerators, shower stalls, and hard water damage. It’s designed to be used on ceramics, enamelled cast iron, steel, porcelain, fibreglass, acrylic and other similar materials.
You can learn more about repairing chipped and cracked ceramic tiles in our complete DIY guide.


