Learn the best way of cutting wood with a jigsaw. A jigsaw is a very useful tool to have in your DIY toolkit, especially if you need to make a lot of cuts in wooden boards or sheets. Having a powered saw will help to speed up the job, and can be used to create curves and even cutouts in wood much more easily than a handsaw.
It takes a bit of practice to use a jigsaw accurately, but as long as you understand how the blade makes a cut, you can quickly learn how to hold and use this power tool.
You can buy a good jigsaw for most DIY jobs for as little as £40, and there are a variety of different blades available for different tasks.
Using a Jigsaw
When cutting wood with a jigsaw, always make sure you are using the correct blade for the material you are cutting. In general, a fine toothed blade will create a neater edge to the cut, but different blades are recommended for different materials. If in doubt, check the manufacturers instructions.
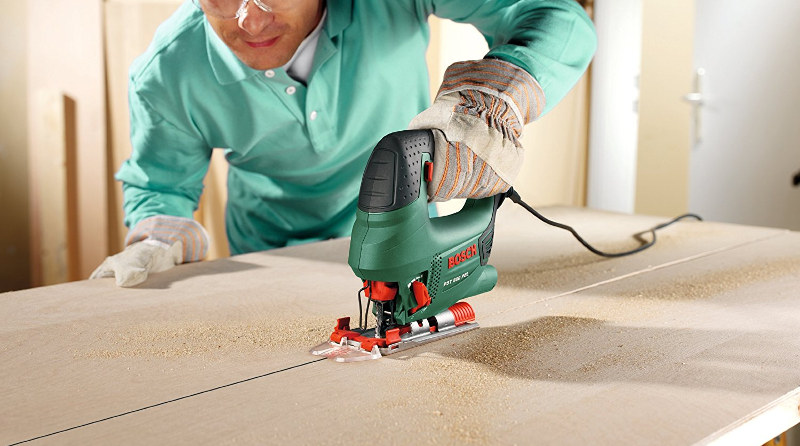
With the blade firmly clamped into the Jigsaw, you now need to make sure that the material to be cut is clamped to a workbench. If you try to hold the timber down by hand, it is likely that the blade will snatch at the material.
Making Short Straight Cuts
Short cuts, such as a piece of batten or skirting board, can be cut freehand (without a guide or straight edge) but should still be firmly clamped to a workbench.
1. Mark the cut line with pencil and check that the line is far enough over the edge of the bench. Hold the front edge of the blade against the side of the timber, just to the waste side of your mark before you press the power button.
2. Start the jigsaw at a slow speed until the blade has bitten into the material at the point of the mark. Make sure that the sole plate of the jigsaw is flat to the surface of the material being cut.
3. Once you are sure that the blade has started cutting you can increase the speed of the jigsaw. Maintain the line of the cut using the guide built into the sole plate of the jigsaw. As you approach the far side of the material, support the weight of the waste piece, ensuring that your fingers are well away from the blade. Stop the saw as soon as the blade is free of the material.
Get over 16000 woodworking plans. Learn how to build anything from furniture to birdhouses out of wood. Clear and detailed plans that guide you through the process of each project step-by-step.
Long Straight Cuts
Jigsaw blades are narrow, allowing for a neat cut and little waste. However, the narrow blade can mean that long freehand cuts can easily wander off of straight, and on thick material the blade can deform, resulting in a cut that is not at 90 degrees to the surface of the wood.
Both of these problems can be avoided by firstly using a straight edge as a guide and by allowing the blade to cut at its own speed rather than forcing it.
Using a Side Fence
1. If your cut closely follows the straight edge of the material, you can use a Side Fence (if one is included with the jigsaw). A side fence projects from the side of the sole plate and can be adjusted to guide a cut up to about 150mm from the edge of the material. It is best to set the side fence, make a cut on a bit of scrap wood and check that the cut will be where you want it.
2. Set the blade of the jigsaw on the cut mark, with the side fence flat against the edge of the material. Start the jigsaw slowly and let the blade bite into the material. Let the blade move at its own speed rather than trying to force it, and make sure that the side fence remains flat against the edge.
Using a Guide Batten
1. If the cut does not follow closely to the edge, you will need to use a guide batten or straight edge instead. A guide batten can be made from any thin length of straight wood or metal. This is then clamped to the material at both ends (and in the middle if possible). To position the guide, hold the saw blade against the cutting line and push the batten up against the edge of the sole plate. Clamp that end in place and repeat at the other end of the cut line.
2. When you have your guide in place, making sure that the clamps will not get in the way of the jigsaw as it moves along the edge, you can start to cut. As always to start with, apply gentle pressure to the power trigger of the jigsaw to cut slowly into the material, making sure that the sole plate is running against the guide batten. Once you are into the cut, you can increase the speed of the jigsaw blade.
Curved Cuts
Curved cuts are obviously harder to get right and will take more time and concentration than a straight cut. Curved cuts are difficult to start from the edge of the material. It is easier instead to drill a hole in the waste area of the wood and start the cut from there.
1. Start your cut from the hole, angling it so that it meets the cutting mark as parallel as possible. If you approach the cutting mark at a right angle, you will not be able to turn the blade to follow the line. For a gentle curve, move the blade slowly, applying slight pressure to the left or right to follow the line of the curve.
2. If the curve is sharp, you will need to move the blade very slowly, turning the body of the jigsaw with a bit more pressure to follow the cutting mark. Make sure you keep the blade on the waste side of the curve, as this will help to ensure that tidying up the curve at a later time with an orbital sander or abrasive paper is easier.
Making Internal Cutouts
Making a cut-out in the wood is fairly straightforward, as long as you take your time and plan the cuts. Cutting out square or rectangular shapes obviously easier than cutting circles or irregular shapes, but the basic rules apply to all.
1. Mark out the area to be cut out on the material. If you are cutting a square or rectangle, draw short lines at 45 degree angles towards the centre of the waste area. Using a 16mm spade drill bit, place the point of the bit at least 8mm along the 45 degree line.
When you drill, this should result in a hole almost exactly in all four corners of the square. If cutting a circle, measure 8mm in from the cutting mark in several places and use these new marks to place the point of the drill bit. Drilling several holes will make it easier to cut out the shape.
2. Insert the jigsaw blade into one of the holes and start to cut along the line. Follow the cutting mark to the next hole you have drilled. Reposition the jigsaw blade and cut the next line or continue to cut around the circle.
In a square cut-out, make sure that you run the saw blade right into the corner, not just into the hole, or you will be left with rounded internal corners (unless this is the required result).
3. When you reach the end of the last cut, be ready for the cut-out to fall away. You can now clean up the inside of the cut-out using a small power sander or abrasive paper.


