
Choosing to Build a pond in your garden might seem like a fairly simple task, but getting each element right, from positioning to the materials you use for construction, can make a huge difference to how well this DIY project turns out. This is especially true if you plan to have fish in the pond.
Ponds are a nice addition to all but the smallest garden and have the bonus of being great for wildlife in the area. With just a few material, a bit of hard work and with a bit of forward planning and the right equipment, you can soon have an attractive new water feature to enjoy. A small garden pond will not require any planning permission, unless you live somewhere with added restrictions such as an area of outstanding natural beauty. If unsure, check with your local planning office before you start digging.
Building a Pond
A step-by-step guide to how to build a pond in your garden, either for decorative purposes, or for keeping fish.
Planning Your Garden Pond
When deciding to build a pond in your garden, the positioning of it is more important that perhaps you might think, and the ponds’ placement needs more thought that just where it looks nicest. The best position for a pond is on level ground, with at least partial cover from the sun. Ponds that are in the full glare of the sun may be prone to more algae growth. Try to pick a spot that is not directly underneath the overhanging branches of deciduous trees, or you risk the pond being filled with falling leaves each autumn. An additional consideration is that some varieties of tree, including Willow, Poplar and Laburnum, can poison the water in a pond if they are too close, so bear this in mind as well.
If you have small children or dogs, safety should also be a concern when planning and positioning a garden pond. When the pond will not be fenced off, try to position it in full view of the house, so you can monitor it (and your kids) more easily. Where this is not possible, consider fitting a pond alarm.
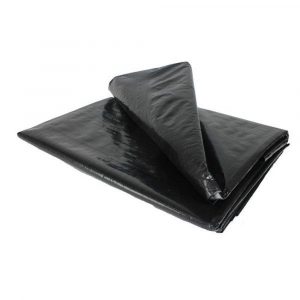
Choosing a Pond Lining
No matter the size and shape of your pond, it will need to be lined with a waterproof liner. This can be in the form of a flexible sheet of rubber, or a pre-formed fibreglass or plastic liner. You can buy pre-formed liners in a variety of sizes and shapes, but the larger ones can be quite expensive. Using a flexible rubber lining sheet gives you much more control over shape and depth for your pond, and will almost certainly be a cheaper option.
Marking Out the Pond
 Once you have found the best position, mark out the edges of the planned pond with pegs or by trickling dry sand out of a bottle. If you have already bought the pond liner sheet, make sure at this point that it is big enough to line the pond to your required depth and overlaps the edge by 10-20cm. A purely decorative pond can be as shallow as 50cm, but if you plan on having fish in the pond, aim for a depth of between 1 and 1.5m, depending on the size of the fish you want to have. Take this depth into account when checking if the liner sheet is large enough.
If you are planning on using a pre-moulded pond liner, use this as a template for marking the pond out. Just remember that if the pond liner is an irregular shape, turning it upside down to mark around it will mean the hole will be reversed in relation to the lining when it is the right way up. And also remember that if the liner has a lip, mark the hole out so that the lip will sit on the surface of the ground.
Digging the Pond
You can now start to dig out the hole for your pond, to the required shape. If you are digging the hole free-form, try to have a step or shelf in the wall of the pond as this allows for different types of plants and animals. Whatever the depth you plan to have the pond, add 5cm to take into account the layer of sand you will need to use as a lining.
If you are using a pre-formed liner, dig the hole to match the shape as closely as possible. Take the time to test the liner in the hole to check that it sits properly. You don’t need to use a layer of sand at the bottom of the hole if using a pre-formed liner, but it can be a good idea to do so anyway, as this makes it easier to ensure the liner is supported equally.
Once you have the pond the shape and depth you require, carefully check the bottom and edges for any sharp stones or roots which could pierce the pond lining (this is also important if you are using a moulded plastic pond liner). Compact the surface of the earth in the hole
Fitting the Pond Liner
 Before laying the pond liner, you should put down a 5cm layer of soft sand, covering the bottom and sides of the hole. This will help to protect the liner from being pierced by hidden stones or roots in the soil. Dampen the sand to help it form to the sides and press it down firmly to stop it shifting about as much as possible. Now drape the pond liner over the hole and press it carefully down to the bottom.
If you are going to stand in the hole whilst positioning the liner, it can be a good idea to remove your shoes to avoid ripping it. Try not to disturb the layer of sand too much when doing this. It is also a good idea to leave a bit of excess in the bottom of the pond liner to allow it to stretch out under the weight of the water. Weigh down the edge of the liner with blocks or bricks to stop the water pulling it out of shape.
Fitting a pre-formed liner is even easier. Again, put down a protective layer of sand in the bottom of the hole, and then move the liner into position. Make sure that it is sitting stable and level in the hole, with the lip resting on solid ground all the way around the hole.
Filling the Pond and Trimming the Liner
You can now slowly fill the pond with a hose pipe, watching to make sure nothing is being pulled out of shape. When the pond is filled to the desired depth, turn off the hose and allow it to settle for a while. You can then rearrange and fold the liner around the edges, to make it look as neat and flat as possible.
The next job is trimming the excess liner around the edge of the pond. You will need to leave at least 200mm of liner for the overlap. This will allow you to anchor the liner with slabs, etc. Trimming the pond lining can be done with a sharp knife or large scissors.
Finishing Off the Pond
If your pond is to be surrounded by paving, etc, make sure you bed down the slabs at the edge of the pond well. You need to try to have the slabs at least overlap the outer edge of the lining, so that the bed of mortar holds the liner as well as the slab. If the edging slabs are bedded down on the liner without an overlap, the edge will be very unstable. If you want a more natural edge to the pond, you can weigh down the liner overlap with large stones as well as pegging it down with metal or wooden stakes.
A few extra things to remember before you build a pond
– If you plan to put fish in your pond, leave it to settle for at least four weeks. You can, however, plant up your pond straight away.
– Be careful not to drop mortar into the pond when bedding down the edging slabs. It will contaminate the water.
– Ponds can be dangerous! If you have small children, think about investing in a pond guard or pond alarm.


