Too few or blocked airbricks can cause serious ventilation problems in the home (there should be one airbrick for every 2 meters of wall), but fitting an airbrick isn’t beyond the Diy-er. Adequate ventilation is essential to your home as it allows the circulation of air, which in turn prevents condensation, helps avoid rot and woodworm attacks, and generally makes the air in your house more pleasant to breathe.
Making Space for Your Airbrick
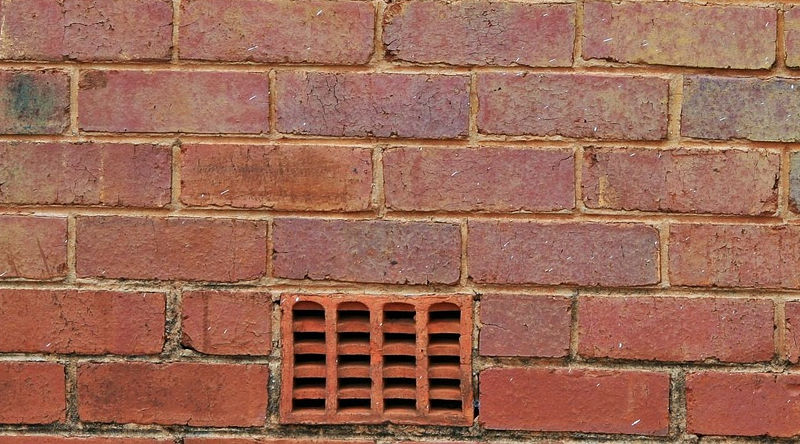
Once you have decided that you need more Air Bricks, you need to decide which type to fit. Older houses will most probably have traditional terracotta airbricks, whilst newer houses might have plastic ones. You can easily find both kinds online and in DIY stores for between £3 and £10.
Once you have your matching airbrick you can mark out where it needs to go on the external wall. Use the level of the existing airbricks to find the correct height and mark the brick to be replaced.
Drill 8mm holes in the joint all the way around the brick you are removing (some airbricks are the size of 2 or even 3 bricks, so drill out as many as needed if this is the case). This will weaken the mortar and allow you to chip out the remainder with a club hammer and bolster. You need to make sure that you remove as much of the mortar from around the bricks as possible.

If the wall is solid (i.e. no cavity) you should drill all the way through the two layers of bricks and remove the inner brick as well. With a cavity wall, remove the brick from the outer layer and then use an extra long drill bit (these can be hired) and a long cold chisel to knock out the brick on the inner layer.
This will be below the surface of the internal floors, so there is no easy way to remove this brick from the inside. The cavity will need to be bridged using a liner to stop air from being lost inside the cavity instead of being distributed underneath the floor.
Fitting Terracotta Airbricks
If the wall is a cavity wall (as most are), you will need to fit a cavity liner in the hole. These should be available from the same places you can buy the airbricks.
Now mix up some mortar and trowel a bed onto the bottom of the hole. Butter the top of the airbrick and slide it into place. Push slightly drier mortar into the joints at the sides of the airbrick and point neatly to finish the external part of the job.
You can leave it like that or alternatively, you can lift the floorboards above the new airbrick and screw an insect plate over the hole on the inside. It is possible to buy wall cavity liners with an insect plate already in place.

Fitting Plastic Airbricks
Plastic airbricks usually come in two parts, one for the outside and one for the inside. Fit the outer part first in the same way as you would for a terracotta airbrick (see above), the inner part should then slide in and interlock with the outer part. This does away with the need for a cavity liner as the sleeves do the same job.
Mix up some mortar and trowel a bed onto the bottom of the hole. Butter the top of the airbrick and slide it into place. Push slightly drier mortar into the joints at the sides of the airbrick and point neatly to finish the external part of the job.
Plastic Air Bricks will have slight protrusions on all of the external faces to give the mortar something to grip.
Using Specialised Airbricks
There are several different types of Airbrick for specific situations. You can buy S-shaped airbricks for where the external ground surface level is higher than the internal floor, cast iron or steel airbricks for period properties, and double airbricks to give more ventilation and airflow.


