
There are many reasons why you might want or need to soundproof a room in your house, from meeting building regulations during renovations to a simple desire to stop hearing your kids practice the same riff on their guitar for hours on end. No matter the reason, soundproofing a room is a perfectly manageable project, and one which can be done in stages until you get to the level of peace and quiet you need or want.
This guide looks at soundproofing options for floors, ceilings and walls, as well as other ways you can soundproof almost any room in your house.
Noise Pollution Sources
Noise pollution (unwanted noise from internal or external sources) is created in two basic forms: airborne and impact. When thinking about soundproofing, it is important to understand which type of noise pollution you are trying to stop, as products designed to stop noise are often classified by which type they cut out.
Airborne noise pollution can come from things like televisions, people talking, kids playing guitars, and impact noise pollution comes from things like heavy footsteps (although this can be airborne too), furniture being moved, etc. Spend some time working out the source of the noises you want to cut out before you begin to soundproof.
Soundproofing a Floor
It is much easier to soundproof a floor than a ceiling, so if the noise is coming from upstairs, and you have the option (I.e. you don’t live in an apartment), soundproofing the floor of the room above the one suffering from noise pollution is best.
It is obviously easier to soundproof before any floor covering has been laid, but if it already has, you will need to remove it before continuing. Once you have stripped the floor covering off, measure the area of the room and purchase acoustic mats and acoustic underlay to fit (if the noise is just impact noise such as heavy footsteps, just the thick underlay might be enough to solve the problem).
If you will be laying carpet on top of the acoustic mat, you will need to fix battens around the edge of the room that are thick enough to lift the carpet grippers up flush with the top of the mat. So with the battens in place (and the grippers if you wish), lay the acoustic mat, making sure it butts up to the battens tightly, and that there are no gaps between sections of mat. Use gaffer tape to seal the gaps between mats and hold them in place.
Next, lay the acoustic underlay on top of the mat, once again up to the edge of the battens and grippers. With that in place, you can lay a normal carpet on top and fix it in place using the grippers (see our guide to laying carpet). Bear in mind that thicker carpet, such as hessian-backed carpet, will offer better additional soundproofing than cheaper foam-backed carpet.
If you will be laying laminate flooring over the acoustic mat, you should remove the skirting, lay the acoustic underlay first, so that it slightly overlaps the edge of the floor. Tape up all joints, and then lay the acoustic mat on top butting up against the wall. Try to ensure that any joints in the mat do not line up with the joints in the underlay.
You should now lay a floating (not fixed) chipboard layer on top of the mat, a layer of laminate underlay on top of that, and the laminate over the top. If you do not lay the chipboard layer, the give in the acoustic mat will cause the laminate floor to break when walked on heavily.
Finally, replace the skirting at the new floor level, with a small gap (as usual) so that it is just above the laminate flooring, allowing some movement.
Soundproofing a Ceiling
As mentioned above, this is a much trickier task than soundproofing a floor. If you have access to the floor above, consider soundproofing the floor instead of the ceiling.
There are two main methods of soundproofing a ceiling: using soundbreaker bars, or holding an acoustic quilt in place with additional wooden joists. If done properly, both methods involve removing plasterboards from the ceiling to expose the joists and cavities between them. A third, less effective option is to apply soundproofing over the existing ceiling surface, and then covering with a false ceiling. Here we will look at using soundbreaker bars, as this is the easiest and most effective method.
Using Soundbreaker Bars
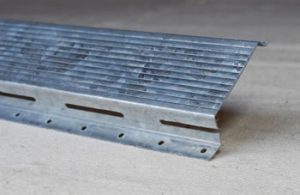 Remove the plasterboard from the ceiling to expose the wooden joists of the floor above. The soundbreaker bars, which are long lightweight metal channels, are then fixed to the joists. The bars need to run across the cavities, not along the length of the joists (perpendicular to the joists), spaced at 400mm apart.
The soundbreaker bars are designed to separate the ceiling surfaces, helping to prevent impact and airborne noise from travelling through when the plasterboard is fixed to them. Alternatively, you can just fill the cavities with the acoustic slab, and then reattach the plasterboard to the joists, but the soundproofing won’t be as effective.
You need to fill the cavities between the joists with acoustic slabs around 100mm deep. This will partly be held in place by the bars, but should be wide enough to fit tightly between the joists anyway.
Plasterboard can now be fixed to the soundbreaker bars to replace the ceiling surface. For best results, use a two layers of plasterboard (one 12mm and one 9mm thick). You can then finish the ceiling as desired with a plaster coat.
Soundproofing a Wall
Adding soundproofing to a wall, or multiple walls, in a room should be thought about carefully. You will be losing floor space, and if soundproofing a wall with a door in it, you will have a lot of extra work to do to make it look good.
Soundproofing Solid Walls
The easiest way to soundproof solid walls is to fit soundbreaker bars horizontally to the surface of the wall, fit acoustic slab material between the bars, and then fix plasterboard over the top. As with using soundbreaker bars on a ceiling, using two layers of plasterboard will further improve the soundproofing. You can then plaster a paint over the top.
Soundproofing Stud Walls
Stud walls have a ready-made cavity just waiting to be filled with acoustic slab or blanket insulation to improve soundproofing. Just take off the skirting and plasterboard on one side of the stud wall, fill the cavities between the studs with your chosen sound insulation material, and replace the plasterboards. This will have the added benefit of improving the thermal insulation as well.
A second option to both of these methods is to build an independent wall in front of the existing wall. This is most easily accomplished using a metal-framed stud wall (which is much thinner than a traditional stud wall, so you lose less floor space).
Fix the metal-framed stud wall 25mm out from the existing wall, fill the gaps between the studs with acoustic slab, fit plasterboard over the top and finish off as desired. Adjust the distance out from the wall if the acoustic slabs you are planning to use are thicker than normal.
Tips to Reduce Sound Travel
Sound travels on air, so making your room as airtight as possible is one way to reduce airborne noise pollution. Here are a few things you can try, to reduce how well sound travels in a room.
- Adding mass to any structure increases its ability to absorb sound. Adding mass can be as simple as filling the cavities in a stud wall with insulation material.
- Fitting foam strips to the bottom of sash windows, and brushes to the sides, can help reduce sound travel from outside. Having double glazing fitted will obviously reduce sound much better.
- If possible, seal the edges of walls and floors, to stop sound travelling from one room to the next.
- Acoustic sealant, flanking tape or flanking strips can be used to isolate structural elements, and reduce how well sound travels through them.


