A guide to painting walls and ceilings. When you are painting a whole room, you should always paint the ceiling first to avoid splashing paint on walls and woodwork. If you are planning to strip wallpaper, leave this on until the ceiling is painted and then any spotting from the ceiling will come off with the paper, rather than being on the bare wall where it could later show through paper or paint. Always cover the whole floor with dust sheets (unless the flooring is being replaced at the same time).
As a rule, ceilings should be painted white, no matter what colour the walls are being painted. This helps to make the room look bigger and reflects light back down into the room to make it lighter. Once the ceiling is complete, you can then paint the walls, and finally the wood or metalwork in the room.
1. Painting a Ceiling
Dust the ceiling and sand off any loose or peeling paint. If there are smokers in the household, it is also worth washing the ceiling with warm soapy water or sugar soap to remove any tobacco residue or grease. The next thing you need to do, now that all your preparation is complete, is to make sure you can comfortably reach all areas of the ceiling.
Either build a movable platform with scaffold boards and trestles (you can hire a small platform if you wish) or buy an extendable handle for your roller. If you decide to use an extension, remember that you will still need a stepladder to be able to reach the ceiling to cut in along the edges and around light fittings, etc.
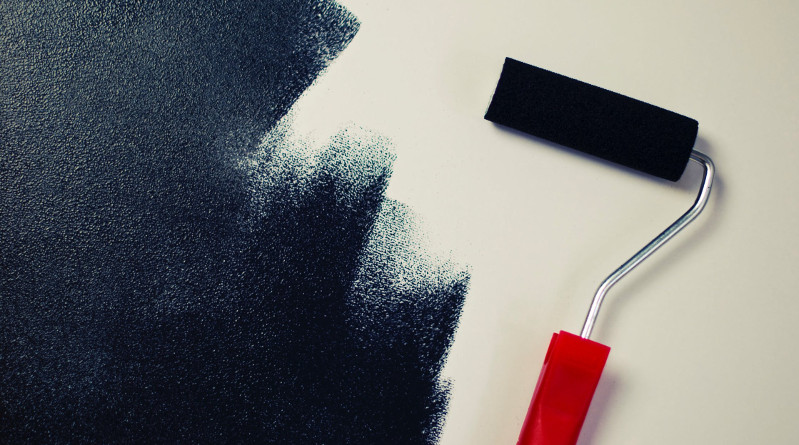
Paint in strips running the length of the room, starting at the wall where the window is. If there is more than one window, start along the wall with the window that lets in the most light. Paint a strip about twice the width of the roller, right the way across the room, then go back and paint another strip next to the first. Make sure the blend the paint where the strips meet.
Once you have painted the main body of the ceiling, carefully cut in around the edges and the light fixture. If the walls are to be painted afterwards, you obviously do not need to be so careful when you cut in. Just be sure not to leave ridges of paint at the top of the walls.
Coving and Ceiling Roses
If your room has coving, paint this with a good quality brush after you have painted the ceiling with your roller. Assuming it is going to be the same colour as the ceiling, paint it before you paint the walls. The same rule applies to ceiling roses and any other decorative plasterwork.
2. Painting Walls
 In almost all cases, it is much easier and quicker to paint walls using a roller or paint pad. Starting in any corner, paint strips of wall about 500mm wide, working from top to bottom. Work in this way across one whole wall before moving on to the next. Cut into the ceiling or coving as you go. If you are using a brush, start in the top corner of one wall and paint in squares of 500mm, working from top to bottom. Make sure you blend in the paint where two squares meet. If possible, always complete a whole wall (or even better, the whole room) in one go. If you think you are going to run out of paint or time halfway across a wall, do not start. It is better to make sure you have both time and paint to finish, or you risk having visible lines and ridges in the paint where the edge has dried.
3. Wall Surfaces
There are several different types of surface you may be facing when painting walls. Each has different characteristics and each requires different preparation and application.
Bare Plaster
Bare plaster is fairly porous so you will need to apply primer or sealer coat. You can buy primer for this, or simply dilute your emulsion to a ratio of 1 part water to 4 part paint and apply this to the bare wall. allow this coat to dry completely before applying at least 2 coats of the full strength emulsion. Bare plaster is best painted with a good quality foam roller.
Lining Paper
Lining paper is perfect for painting as it will even out the wall beneath and hide any cracks or dents. You will probably still need to apply 2 coat of emulsion, allowing each coat to dry before applying the next. When painting over wallpaper of any kind, small bubbles will sometimes for as you progress. Do not worry about these as they should disappear again as the paint dries.
Wallpaper
Textured wallpaper should be painted with a deep pile roller to ensure that the paint gets into all the little pits and bumps. Ordinary flat wallpaper can be painted over with a standard foam roller, but make sure it is well attached to the wall first. If it is old wallpaper, paint a small patch first to test if the water from the paint is going to peel the paper off the wall. If so, you will need to strip the whole wall. Dark wallpaper will usually require several coats if you are using a light colour. Never try to paint over metallic wallpaper (or wallpaper with metallic patterns) as the metallic areas are very hard to cover and will show through many coats of emulsion.
Painted Plaster
If there is already a sound layer of paint over the base plaster, you can simply paint over it. You should wash the wall down with sugar soap first, as this will remove any grease and dirt and give the new paint a better key. Dark colours will require 2-3 coats of lighter emulsion to cover them, or you can apply a high pigment undercoat first. If you are painting over gloss paint, you need to rub the old paint down well to destroy the gloss coating and give the new paint something the key on to. Make sure you wipe away any created dust from the wall after sanding it down.
Artex/Textured Coating
You can paint this in the same way you would paint a flat surface, using standard emulsion. However, you should use a deep pile roller to ensure that the paint gets into all areas.
4. Painting Tools
Having the correct equipment is half the battle when painting the walls or woodwork of your home. Whilst you may need to buy or hire some specialist equipment from time to time, the list below is a good starting point for the tools you will need when redecorating your house.
Paint Brushes – Buy the best brushes you can afford in a range of sizes. Try to get genuine bristle or good quality synthetic bristle for the best finish. Quality brushes, if cared for after use, actually improve with age. Useful sizes include: 18mm, 25mm, 50mm, 100mm and 125mm. You may also want to buy a radiator brush. These have a metal handle, which can be bent to allow access behind radiators.
Rollers – As with brushes, it is best to buy good quality rollers if you can afford it. Rollers give a smooth, flat finish over large surfaces and are ideally suited to working with water-based paint.
Different roller types include:
- Foam – Cheap and easy to clean, but will not give the best finish.
- Mohair – The very fine texture allows for a very smooth finish. Not for use on textured surfaces.
- Shaggy Pile – The thick pile makes this type of roller ideal for painting textured surfaces where a smoother roller would not cover as well.
- Radiator Roller – Designed with a thin head and a long handle, these are perfect for getting behind radiators, etc.
Paint Pads – Good quality paint pads will give a very good finish on smooth or lightly textured surfaces. They are generally made of a thin layer of mohair on top of a foam base. They come in a range of sizes and often allow for handles to be attached so you can reach high places.
[amazon_link asins=’B000Y8ZK80,B0756PVK5N,B071HTMDPW’ template=’ProductCarousel’ store=’subscribeands-21′ marketplace=’UK’ link_id=’4558ef3d-a546-11e8-b971-fb33ea19c474′]


