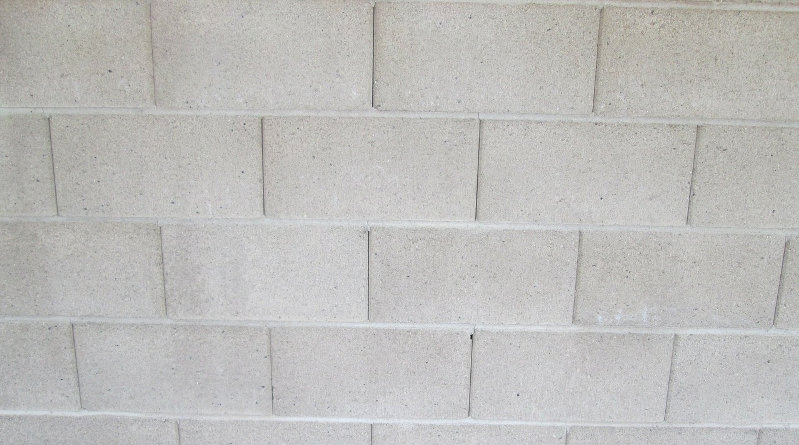
There are several reasons why you may want to build a partition wall from solid blocks, rather than the potentially easier and quicker stud partition wall. Solid walls will give far greater acoustic and thermal insulation than a stud wall (even if the stud wall has insulation fitted) and will certainly feel more solid. A solid block wall can also offer at least some level of support for rooms above, although it should not be considered a structural wall or a load-bearing wall. This guide will take you through the steps of planning a solid block partition wall. For a complete guide to building a solid block wall, click here.
Building with Block or Stud?
Before you go ahead with your solid block wall, consider the reasons why you want to build in that material.
-
What will you be using the new room for? Does it need a greater level of sound or thermal insulation?
-
Is the room on the ground floor and does it have a solid concrete floor (suspended wooden floors are a poor footing for solid block walls due to their weight).
-
Will the new wall need to have power, water or other services running through it? It is easier to pass services through a stud wall than to drill holes and chisel conduit in solid blocks.
-
You should also consider the building regulations in your area, whether building in blocks or wooden studs. As the wall is not load-bearing, you probably won’t need permission, but it is always better to make a phone call to check.
Step 1 – Positioning of the Block Wall
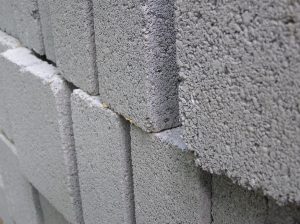 In an ideal situation, a solid block wall will be positioned on a solid concrete floor, at ground level, between two existing masonry walls. This will provide the best possible footing and support at the ends of the wall. Metal wall profiles (long metal strips which attach to the end walls and provide prongs which the new wall can be tied into) can be attached to both masonry walls and stud walls, but if attaching to a stud wall, the block wall will need to line up with a stud. It is possible to build a block wall on a suspended wooden floor, and between stud partition walls, but there are several extra things you will need to consider if this is the case.
Step 2 – Building Off a Wooden Floor
If you are planning on building off of a wooden floor, you will need to check that the floor is capable of supporting the not inconsiderable weight of a solid block wall. Use a stud detector to find floor joists and try to position the wall directly above a joist, running in the same direction. If the wall is being reinstated where a one previously stood, there may be a reinforced joist in place under the floor.
If the block wall is running across the floor joists, you can use a timber sole plate (as with building a stud wall) to spread the weight. In this case, ensure that the timber used for the sole plate is the same width as the blocks you are using. If you are not sure if your wooden floor can support a block wall, speak to building professional or planning officer.
Step 3 – Planning Openings
If there are to be openings, such as a doorway, in the solid block wall, you should plan its position before you start laying blocks. Make sure you know how wide it needs to be to accommodate the door you plan to use (including the door lining).
You will also need to support the blocks above the top of the doorway with a lintel. As the wall will not be load-bearing, this can be a simple concrete lintel, or a stronger metal one if you prefer. Concrete lintels are generally the cheapest type to buy. You will need to do this even if the opening will have a door and door lining fitted.
Step 4 – Consider the Build Time
Even for a short span, building a solid block wall is a considerable task. You should plan to take at least two full days just for the construction of the actual wall, with extra time added to prepare, plaster and skim, fit any doors and finish off. Solid concrete blocks can be heavy, so you will need to let mortar dry overnight after completing 5-6 courses. The wall may collapse or shift under its own weight if you fail to do this. However, if you are using lightweight thermal insulation blocks, you can build from floor to ceiling in a single day.
If you are not experienced at laying blocks, it is far better to plan a longer build period so that you can take your time and hopefully avoid mistakes.
Step 5 – Choosing Building Materials
If the floor is strong enough, you can use solid concrete blocks to build the wall. These will usually be the cheapest option. If you are worried about the strength of the floor, or if you are particularly worried about thermal insulation, you can choose to use lightweight thermal insulation blocks. The added bonus of using these is that they are much easier to work with and the build should progress more quickly.
Estimating how many blocks you will need is fairly simple. Measure the height and width of the room the wall will be spanning. Multiply the two measurements to give you the area of the wall (e.g. 3m x 4m = 12 square metres). Now measure the width and height of a block, and multiply the measurements in the same way. Divide the walls area by the blocks area to find how many blocks you need. If you are unsure, there are several building material calculators online which will work things out for you. Add approximately 10% to the total number of blocks to allow for cut blocks, breakages or damages.
Mortar can be ready-mix in bags, and you only need general purpose mortar for most situations. The information on the bag should give an estimate as to how many blocks the contents will be suitable for. If not, speak to a builders merchant for advice on quantity. When mixing mortar, only mix up as much as you can comfortably use before it begins to dry out. Drying mortar will not hold nearly as well as when it is first mixed.
Tools You Will Need
As well as the blocks and mortar, there are several other tools you will normally need to build a solid block wall properly.
Spot Board – For holding mortar when spreading.
Shovel – For mixing mortar.
Spirit Level – For checking wall is level and upright.
Wall Profiles – For tying the wall into existing walls.
Wall Ties – For tying the wall into existing walls.
String Line – For setting out a straight line to follow.
Brick Trowel – For spreading mortar on blocks.
Bolster Chisel – For cutting blocks.
Club Hammer – For cutting blocks.
Lintel – To support blocks above an opening.
Step Ladder – For reaching the top of the wall.


