
The ultimate guide to hanging shelves. Adding shelves to a room, whether as a feature or in a hidden-away corner, is one of the easiest ways of creating extra storage. Shelves can be made from a wide variety of materials, can be hung in a number of different ways and can be bought ready-made or custom build to suit a specific style or size.
This guide will look at the many different types of shelf available, as well as the different ways they can be supported or hung.
Shelving Materials
Pre-cut shelves are available in a variety of different materials, from softwood to glass. The shelving material you choose will depend on budget, room style and the span. You can also find material for shelving in reclamation yards, particularly good if looking for an aged look.
Softwood Shelves
Most often made of Pine or similar wood, softwood shelves are probably the most common type available today, and can be found in a large range of lengths, depths and thickness’. Softwoods can be painted easily, stained or varnished, or even waxed. Softwood shelves are generally quite cheap to buy, but you should avoid very cheap softwood shelves as they are more prone to splitting and warping.
Hardwood Shelves
Generally more expensive than softwood shelves, hardwood shelves are often made of oak or more exotic imported wood. Hardwood shelves are preferable if they are going to be left unpainted or untreated, as the colour and grain is usually more attractive. As with softwood shelves, hardwood shelves are available in a variety of lengths, depths and thickness’.
Medium Density Fibreboard (MDF) Shelves
MDF is a great shelving material if you require non-standard shapes or sizes, but it will certainly need to be painted as it isn’t a very attractive material,. MDF shelves are probably therefore more commonly used within cupboards or in other hidden areas. You can buy pre-cut MDF shelves in a variety of sizes quite cheaply, and some DIY stores will cut MDF shelves to your specification for a small fee.
Plywood Shelves
Plywood is made by glueing several thin layers together, meaning plywood shelves can be very strong even when fairly thin. Most useful for areas where decorative finish is not required such as inside cupboards or cabinets. Not suitable for areas of high moisture like bathrooms or kitchens.
Veneered Chipboard Shelves
A good compromise between style and price, these shelves are made to look like hardwood by applying a thin veneer over a cheaply made chipboard or fibreboard base. The shelves included with most flat-pack furniture is veneered chipboard. The main problem with using veneered shelves is that they cannot be cut or altered to fit, so must be bought to an exact size.
Melamine Shelves
Similar to veneered chipboard, melamine uses coloured, textured or wood effect plastic over a chipboard base. This type of shelf can provide a hard-wearing storage solution, but the same problems as with veneered shelves applies.
Pressed Metal Shelves
Pressed metal shelves provide a very hard-wearing storage solution, but are not the most attractive things to look at. Pressed metal shelves are, however, great for use in garages or sheds, and will usually be part of shelving system which includes slotted metal strips and brackets.
Glass Shelves
Ideally should always be made of toughened glass, but it is always important to check how much they can carry safely. This should always be printed on the packaging or in the instructions. Glass shelves can be a very attractive addition to a room, and are particularly good in bathrooms as the moisture will have no effect on them.
Choosing Shelving Brackets
 There are many different types of shelving brackets available, but the type you choose to use should be based on style, the amount of support needed and what the brackets will be fixed to.
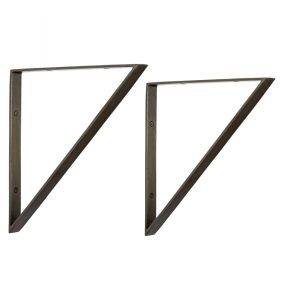
Utility brackets, either L-shaped metal or a right-angle section of wood, are the most common. These provide good support and usually have multiple fixing points making them suitable for most wall types.
Floating shelf brackets are thin metal rods or threaded bar which slide into holes drilled into the back edge of the shelf material. These are often considered better looking, as once the shelf is in place, no support bracket can be seen. They are, however, not suitable for heavy loads, nor are they suitable for all wall types (ideally, they should be fixed into masonry).
Adjustable shelving systems usually comprise a pair of slotted steel strips which are attached vertically to the wall. Pre-made brackets, with lugs corresponding to the slots, are then slotted in at the level required. The shelving material is then laid loosely onto the brackets. If you need to change the height of the shelf, you simply move the brackets up to a higher slot.
Brackets designed for specific purposes, such as glass shelf brackets and peg and slot brackets for use in bookcases are also available.
Shelving an Alcove – Made-to-measure Shelving
Step 1 – If planning a single shelf, work out the height you want it to be. If you are planning multiple shelves, measure the height of the alcove and divide it equally between the number of shelves required. In either case, use a tape measure and spirit level to mark where the lower edge of each shelf will sit, on both the sides and back of the alcove. With multiple shelves, start with either the top or bottom shelf.
Step 2 – Measure the full length of the back line and cut 50mm x 25mm batten to fit. Start with the batten at the back of the alcove, hold it against the line and drill pilot holes at the ends and one in the middle. Use a masonry drill bit to drill out the holes in the wall and fit wall plugs. Fix the batten into place using appropriate screws.
Step 3 – Measure and cut two battens to fit the sides of the alcove. The side battens don’t have to come right out to the edge, but they should be at least two-thirds of the shelf’s depth. To further hide the battens, saw off the outer corner at a 45 degree angle. Drill pilot holes and fix them into place in the same way as above.
Step 4 – Double-check the width of the alcove and cut your shelving material to fit. If the walls of the alcove are not square, scribe the shelf to fit. You can either lay the shelf loosely onto the battens, or you can fix the shelf into place by nailing it to the back batten every 250mm.
Using Ladder Supports
If the alcove is wide, it may be better to use ladder supports rather than the batten method shown above. To make a ladder support, cut the battens as above, but cut an extra batten for the front of the shelf and cut shorter battens to fit between them at intervals of around 300mm. Screw all of these components together to create a ladder-like frame using butt joints. Countersink the screws used to fix the cross battens as you may want to fill them later.
Once the frame and shelf is fixed in place, you can either fill the visible screw holes with wood filler that matches, or you can fix decorate moulding to the front of the shelf.
[amazon_link asins=’B00WAPGKIE,B06XGXGMX9,B072FPJK9M’ template=’ProductCarousel’ store=’subscribeands-21′ marketplace=’UK’ link_id=’3b6c816f-943e-11e8-b4cb-8b0e06ee5fce’]


